Tig welding can produce clean and high-quality welds; it has become a popular choice for artists who want to incorporate metal into their work. While tig welding may seem intimidating to those new to the process, it is a technique that can be easily learned with the right guidance.
It is often preferred for its precision and ability to create high-quality welds on thin materials. This beginner’s guide to tig welding for artistic applications will provide the necessary information and tips for those interested in exploring this welding method’s creative potential.

Tig Welding for Artistic Applications
Tig welding can be a valuable tool for creating intricate and unique pieces in art and design. The process allows for a wide range of creativity and control, making it possible to achieve various effects and finishes.
Equipment and Materials
To start with Tig welding, you will need a few key pieces of equipment. The most important is a Tig welder, which can be purchased or rented from a welding supply store. You will also need a Tungsten electrode, welding wire, and a welding helmet to protect your eyes and face.
Tig welding can be used on various materials, including steel, aluminum, and stainless steel. Choosing the right filler material for the job is important based on the specific properties and characteristics of the metal you work with.
Setting Up for Welding
Before you begin welding, it is important to properly set up your work area and materials. This includes ensuring you have a clean, flat surface to work on and that all of your equipment is in good working order.
Proper machine settings are crucial for successful Tig welding. This includes setting the correct current and voltage levels and choosing the right filler material. Finding the right settings for your specific project may take some trial and error.
Techniques for Welding Artistic Pieces
One of the key benefits of using Tig welding for artistic applications is the ability to build up layers of weld material to create texture and depth. Adding and manipulating the weld pool makes it possible to create a wide range of effects, from smooth and seamless to rough and organic.
Filler materials can also add texture and pattern to your welds. By adding different types and amounts of filler material, you can create a wide range of visual effects.
Polishing and finishing techniques are important aspects of creating high-quality artistic welds. Sanding, grinding, and polishing can be used to smooth out rough edges and achieve a polished finish.
Safety Considerations
Tig welding can be a safe and rewarding hobby or profession if proper safety precautions are taken. It is important to wear protective gear, including a welding helmet, gloves, and protective clothing.
It is also important to follow all safety guidelines for Tig welders, including proper grounding techniques and avoiding electrical shock.
Practice and Patience
Like any new skill, Tig welding takes practice and patience to master. It is important to start with small, simple projects and gradually work your way up to more complex pieces.
As you gain more experience, you will become more comfortable with the welding process and be able to tackle more challenging projects. Remember to be patient with yourself, and don’t get discouraged if you make mistakes along the way – it is all part of the learning process.
What Angle Do You Hold Tig At?
The TIG torch should be held at a slight angle to the workpiece, with the tungsten electrode pointed toward the center of the weld joint. The torch angle should be about 10 to 15 degrees perpendicular to the workpiece. This angle helps to focus the arc and provides better control over the weld joint.
The angle of the TIG torch may need to be adjusted based on the position of the weld joint and the type of material being welded. For example, the angle may need to be increased for vertical welds or decreased for horizontal welds.
What Temperature Do You Tig Weld At?
The welder controls the temperature of the weld through the heat input and the filler metal addition. The welder can adjust the heat input by adjusting the current and the arc length, and they can control the filler metal addition by manually feeding the filler metal into the weld joint.
It is important to control the temperature of the weld to ensure proper fusion and penetration of the weld. Overheating the weld can cause distortion and other problems while underheating the weld can result in poor fusion and weak welds.
What Are The 5 Correct Essentials Of Welding?
The five correct essentials of welding are:
Cleanliness: Keeping the work area and the materials clean is important to ensure that the weld is free of contaminants and defects.
Joint Design: The joint design should be appropriate for the materials being welded and the type of weld being performed.
Preparation: The materials should be prepared before welding, including proper fit-up, edge preparation, and preheating if necessary.
Welding Technique: The welder should use the correct welding technique for the welded materials and the type of weld being performed.
Welding Equipment: The welding equipment should be properly maintained and in good working condition.
Is Mig Or Tig Better For Beginners?
MIG welding (Gas Metal Arc Welding) and TIG welding (Gas Tungsten Arc Welding) are both good welding processes, but they have some differences that may make one more suitable for beginners than the other.
MIG welding is generally easier for beginners than TIG welding, as it requires less precision and involves fewer steps. MIG welding is a semi-automatic process that uses a continuous wire feed and a shielding gas to protect the weld from contamination. To create the weld, the welder must hold the MIG torch and guide the wire into the weld joint.
On the other hand, TIG welding is a more precise and complex process requiring the welder to manually feed the filler metal into the weld joint and control the heat input. It is generally considered more difficult for beginners to learn than MIG welding.
That being said, both MIG and TIG welding can be learned by beginners with proper training and practice. It may be helpful for beginners to start.
How Do You Start A Tig In Scratch Start?
To start a TIG weld using the scratch start method, the welder should follow these steps:
- Set up the TIG welding equipment, including the power source, the TIG torch, and the shielding gas.
- Prepare the workpiece and the tungsten electrode. The workpiece should be clean and free of contaminants, and the tungsten electrode should be ground to a sharp point.
- Connect the TIG torch to the power source and the shielding gas.
- Hold the TIG torch in the desired position, with the tungsten electrode pointed towards the center of the weld joint.
- Scratch the tungsten electrode against the workpiece to initiate the arc. The welder should apply a small amount of pressure to the tungsten electrode and move it in a back-and-forth motion until the arc is established.
- Adjust the current and the filler metal addition to maintain the arc and create the weld.
It is important to note that scratch start TIG welding can be difficult for beginners to master, as it requires good control of the TIG torch and the ability to initiate
Conclusion
In the age of streaming music and digital media, it may seem like cassette tapes are a thing of the past. However, for many audiophiles and music enthusiasts, cassette tapes and decks are still a beloved and integral part of their listening experience. Cassette decks allow you to play, record, and edit audio on cassette tapes, and they come in various sizes and styles to suit different needs and budgets.
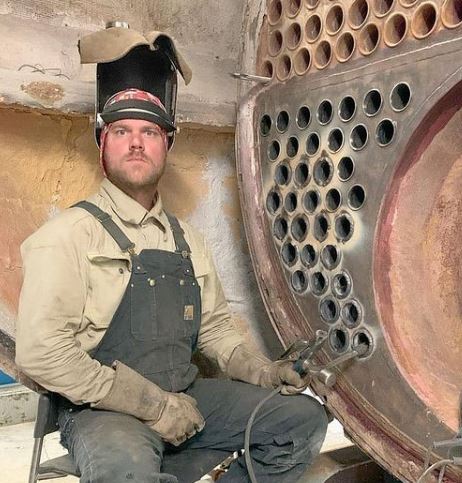
It’s been years since I got into welding as a side hustle. It’s been so long since Doing All kinds of welds for business and pleasure as this is my hobby. Being in this field I have learned from hands-on-experience also came to know what gears work and what doesn’t. The Tig Welder is my own platform where I use to share my experience.




Leave a Reply