Tungsten inert gas (TIG) welding is a popular and highly versatile welding process often used for welding aluminum and other non-ferrous metals. It is known for producing clean, high-quality welds with minimal defects and a polished appearance.
However, welding aluminum can be challenging due to its unique properties and the potential for defects such as porosity, slag inclusion, and undercutting. It is important to choose the right equipment and follow the appropriate procedures to produce the best welds.

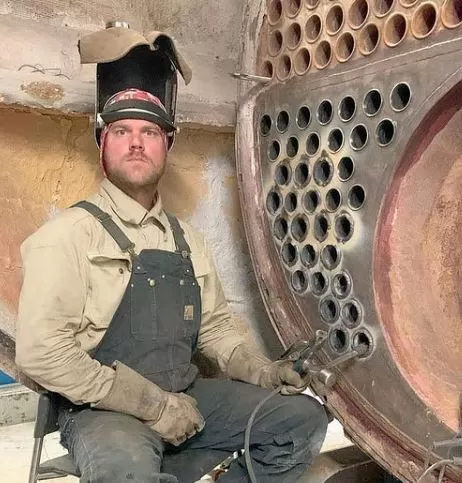
Tig Welding Aluminum
This article will provide a step-by-step guide for TIG welding aluminum, including tips for selecting the right equipment and preparing for the welding process.
Clean And Prep The Aluminium
The first step in TIG welding aluminum is cleaning and preparing the welded parts. This includes removing any dirt, debris, or oxide build-up from the surface of the aluminum using a wire brush or grinder. It is important to remove these contaminants, as they can interfere with the welding process and produce defects in the weld.
After cleaning the aluminum, you should also check the fit and alignment of the parts to be welded. Proper fit and alignment are crucial for producing a strong, defect-free weld. Make any necessary adjustments to ensure that the parts are properly aligned before beginning the welding process.
Set Up The Tig Welder
The next step is to set up the TIG welder according to the requirements for welding aluminum. This includes choosing the correct TIG welding machine and settings, selecting the appropriate shielding gas and filler material, and setting the amperage and travel speed.
Choosing the right TIG welding machine: When welding aluminum, it is important to use a machine specifically designed for TIG welding. A constant current (CC) welding machine, also known as a DC power source, is generally recommended for welding aluminum.
Selecting the appropriate shielding gas and filler material: The type of gas and filler material you use can greatly impact the quality of your welds. For aluminum, it is generally recommended to use an argon-based shielding gas and a pure aluminum filler material. It is important to follow the manufacturer’s recommendations for shielding gas’s specific type and flow rate.
Setting the amperage and travel speed: The amperage and travel speed are important factors that can affect the appearance and strength of the weld. For aluminum, a good starting point is to use an amperage of 20-30 amps for thin sheets, 40-80 amps for thicker sheets, and 80-120 amps for pipes or thicker materials. The travel speed should be adjusted according to the material’s thickness and the weld’s desired appearance.
Begin The Weld
Once the TIG welder is set up, and the aluminum is prepared, you can begin the welding process. To initiate the arc, you will need to use a high-frequency start. This involves turning on the high-frequency current and touching the tungsten electrode to the workpiece to create the arc.
Once the arc is established, you should maintain a stable arc throughout the weld by adjusting the distance between the tungsten electrode and the workpiece. It is important to avoid letting the arc wander or go out, as this can cause defects in the weld.
It would help if you used the correct travel angle and speed to control the weld pool and produce a smooth, continuous bead. The travel angle is the angle at which you hold the torch relative to the workpiece, and the travel speed is the speed at which you move the torch along the weld joint. It is generally recommended to use a travel angle of about 10-15 degrees and a travel speed consistent with the amperage and travel speed settings you have chosen.
Another important factor to consider when welding aluminum is overheating. Aluminium is a heat-sensitive metal, and it is easy to overheat it and cause warping or distortion. To avoid overheating, you should move the torch along the weld joint at a consistent speed and avoid dwelling in one spot for too long. It would help if you also were careful not to allow the weld pool to cool too quickly, as this can lead to defects such as porosity and slag inclusion.
Finish The Weld
Once you have completed the weld, gradually reduce the amperage and allow the weld pool to cool naturally. This will help to minimize the risk of defects and improve the overall appearance of the weld.
After the weld has cooled, you should inspect it for defects and make any necessary repairs. This may include grinding down any rough or uneven areas, filling in any porosity, or removing any slag inclusion.
FAQ’s
How Do You Tig Aluminium For Beginners?
TIG welding aluminum can be challenging for beginners, but with practice and the right technique, it is possible to achieve good results. Here are some tips for TIG welding aluminum as a beginner:
Practice on scrap pieces of aluminum before attempting to weld on your final project. This will allow you to get a feel for the welding process and make any necessary adjustments to your technique.
Use a lower amperage setting when starting. A lower amperage setting will allow you to better control the weld puddle and reduce the risk of burning through the material.
Use a consistent, smooth motion when welding. Avoid stopping and starting the weld as much as possible, as this can cause the weld to become cold and weak.
Use the right filler material and shielding gas for the aluminum you are welding. A pure argon shielding gas and an aluminum filler material are recommended for most aluminum alloys.
Wear the appropriate personal protective equipment, including a welding helmet, gloves, and apron.
How Do You Weld Aluminium With A Tig?
To weld aluminum with a TIG welder, follow these steps:
Clean the aluminum thoroughly to remove any dirt, oil, or other contaminants that could affect the quality of the weld.
Set up your TIG welder and ensure the correct filler material and shielding gas. A pure argon shielding gas and an aluminum filler material are recommended for most aluminum alloys.
Clamp the aluminum securely and ensure you have good access to the weld joint.
Place the TIG torch in your dominant hand and the filler material in your non-dominant hand.
Begin the weld by striking an arc on the aluminum and establishing the puddle.
Slowly add filler material to the puddle as needed, using a consistent, smooth motion to avoid stopping and starting the weld.
Use the torch to manipulate the puddle to achieve the desired weld shape.
Once the weld is complete, allow the aluminum to cool before removing it from the clamp.
What Polarity Do You Tig Aluminium With?
When TIG welding aluminum, it is generally recommended to use direct current electrode negative (DCEN) polarity. This means that the electrode, or tungsten, is connected to the power supply’s negative terminal, and the workpiece is connected to the positive terminal. DCEN polarity allows for better arc control and a more stable arc when welding aluminum.
Do You Weld On Ac Or Dc On Aluminium?
When TIG welding aluminum, it is generally recommended to use direct current (DC) rather than alternating current (AC). This is because DC typically provides better arc control and a more stable arc when welding aluminum, which can result in a stronger, higher-quality weld. Additionally, many TIG welders need to be equipped to produce AC, so it may not be an option in some cases.
Do You Push Or Pull When Tig Welding Aluminium?
TIG welding aluminum is generally recommended to push the torch rather than pull it. This is because pushing the torch allows you to better control the weld puddle and achieve a smoother, more consistent weld. When pushing the torch, you should hold the torch at a slight angle to the workpiece, with the tungsten pointing slightly ahead of the weld joint. This will allow you to see the weld.
Conclusion
In summary, TIG welding aluminum is a highly skilled process that requires the right equipment and a careful approach. Following the steps outlined in this guide and practicing your welding skills, you can produce high-quality welds on aluminum and other non-ferrous metals. With time and experience, you can become an expert TIG welder and take on even the most challenging welding projects.
It’s been years since I got into welding as a side hustle. It’s been so long since Doing All kinds of welds for business and pleasure as this is my hobby. Being in this field I have learned from hands-on-experience also came to know what gears work and what doesn’t. The Tig Welder is my own platform where I use to share my experience.


Leave a Reply